Collections view
Collections view gives an overview of your most recent collections, ordered by their date.
Search bar: use the search bar to search for collections by name, or by assets present within the collection. Use the filters outside of the search bar to search by athlete, season, or tag groups (which you can add, customise and create in the Taxonomy & labels page).
Edit button (✏️): this button allows you to choose the ‘Thumbnail’ of the collection from the assets within the collection. You can choose from the Collection itself, or upload from your computer.
Within collection
Buttons
Upload: use the ‘Upload’ button to upload content to the collection.
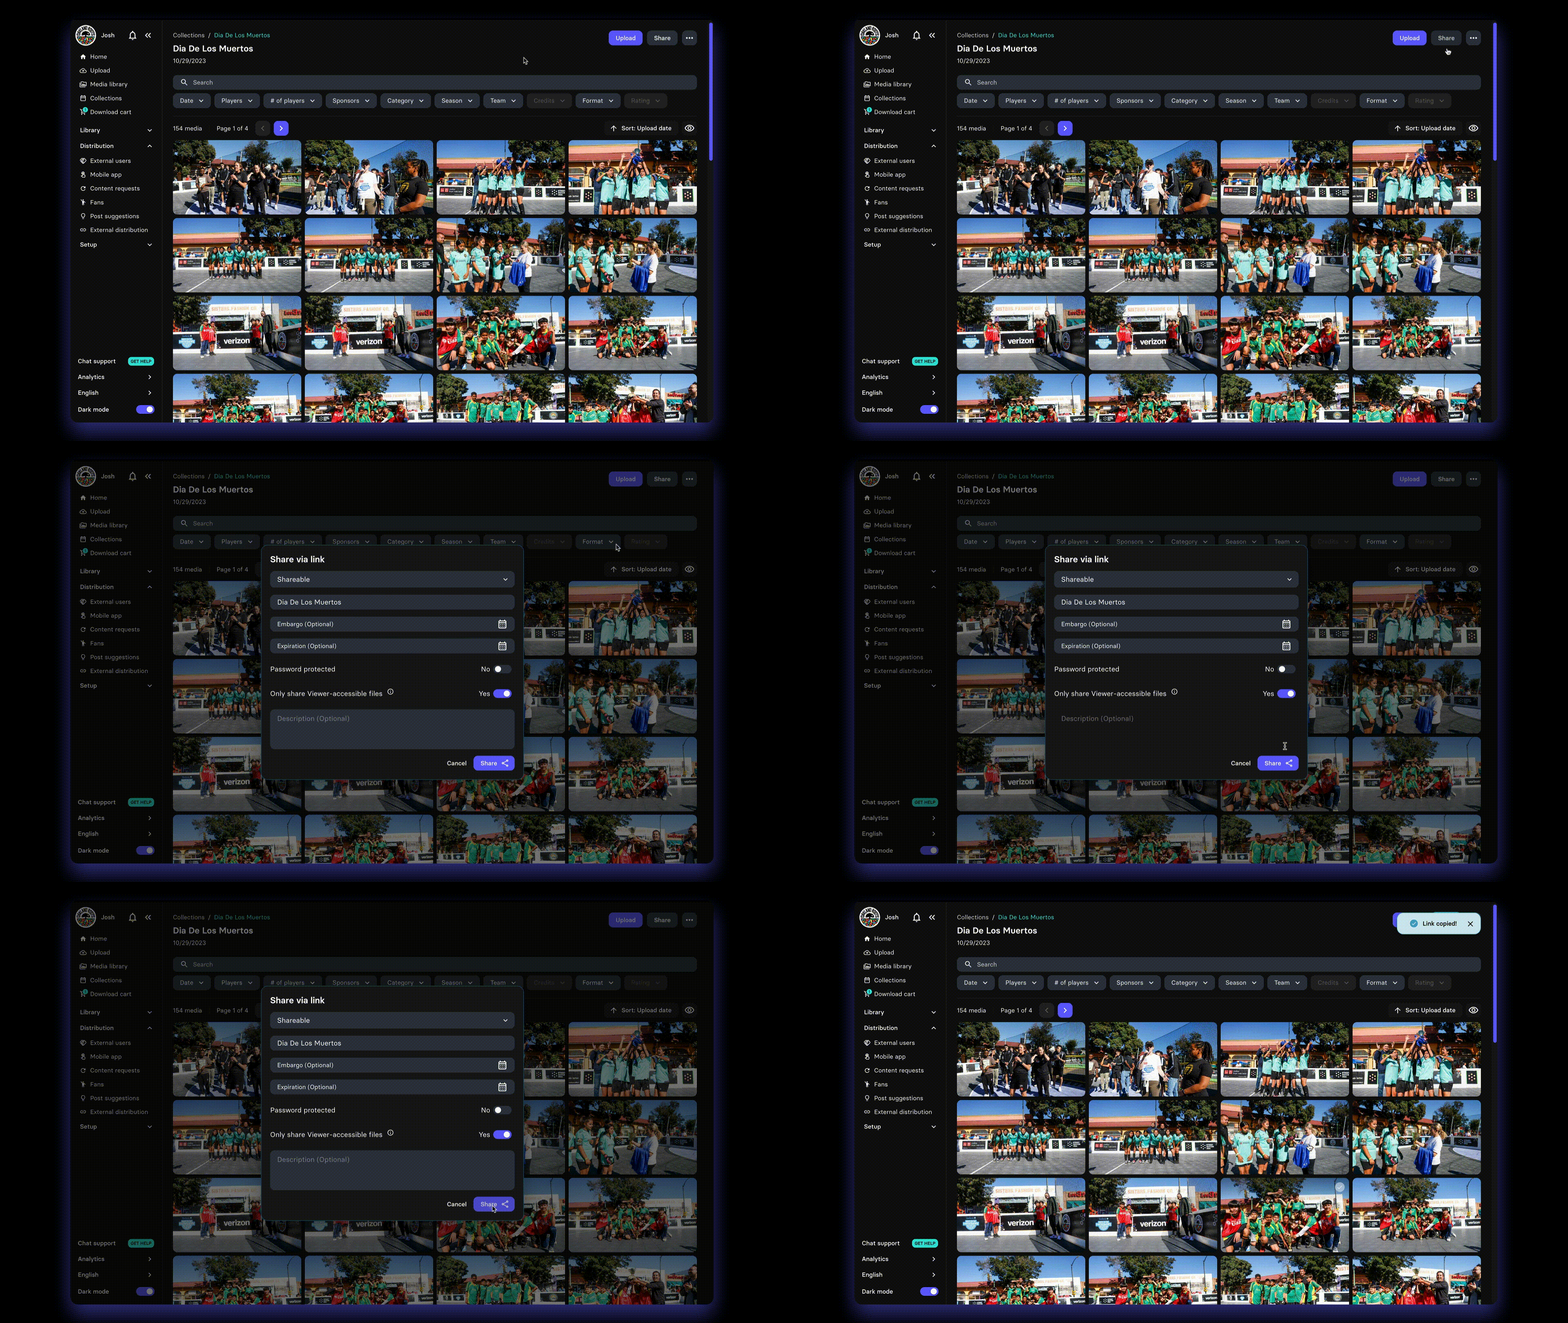
Share:
Use the ‘Share’ button to create a shareable link. Perfect for sharing an entire collection or a few assets to an external party. This link will be dynamic meaning new files added to the collection will be seen on previously shared links.
Use the ‘Share’ button to create a public marketplace in order to sell your assets. Set the price of the assets in your settings.
Within ellipsis (•••)
Edit:
Use the ‘Edit’ button to edit the name of the collection, the date, change your Tag Groups or add additional tags to the collection.
External Upload link: use the ‘Upload link’ button to generate a link and copy it to your clipboard, which you can share to external parties for them to upload directly to the collection.
Delete: use the ‘Delete’ button to delete the collection.
Download all: use the ‘Download all’ button to download every asset in the collection.
Search bar: use the collection search bar to search through the collection.
Use the filter button for an ‘Advanced search’, where you can ‘View the collection as’ different types of user and search in an advanced way (e.g., Must Match ‘Tag X’, Must not Match ‘Tag Y’).
Use the filters outside of the search bar (Toggle on or off with Filters) to search by athlete, season, or tag groups (which you can add, customise and create in the Taxonomy & labels page).
Date: use the ‘Date’ button to filter by date using the dropdown calendar.
‘Eye’ button (👁️ ): use the ‘Eye’ to toggle whether you want the ‘File name’, ‘Comments’, ‘Versions’, ‘Label’ and ‘Video length’ viewable on the thumbnails.
Upload date: use the ‘Upload date’ button to sort your assets based on either: ‘Upload date (New to old)’, ‘Upload date (Old to new)’, ‘Name (A-Z)’, ‘Name (Z-A)’.
Select
Hover to select: hover over an asset and click ✅ to select an asset.
Select page: use the ‘Select page’ button to select all assets that have loaded on the page.
Select all: if you select the whole page, a pop-up will appear to give you the option of selecting all assets in the Collection.
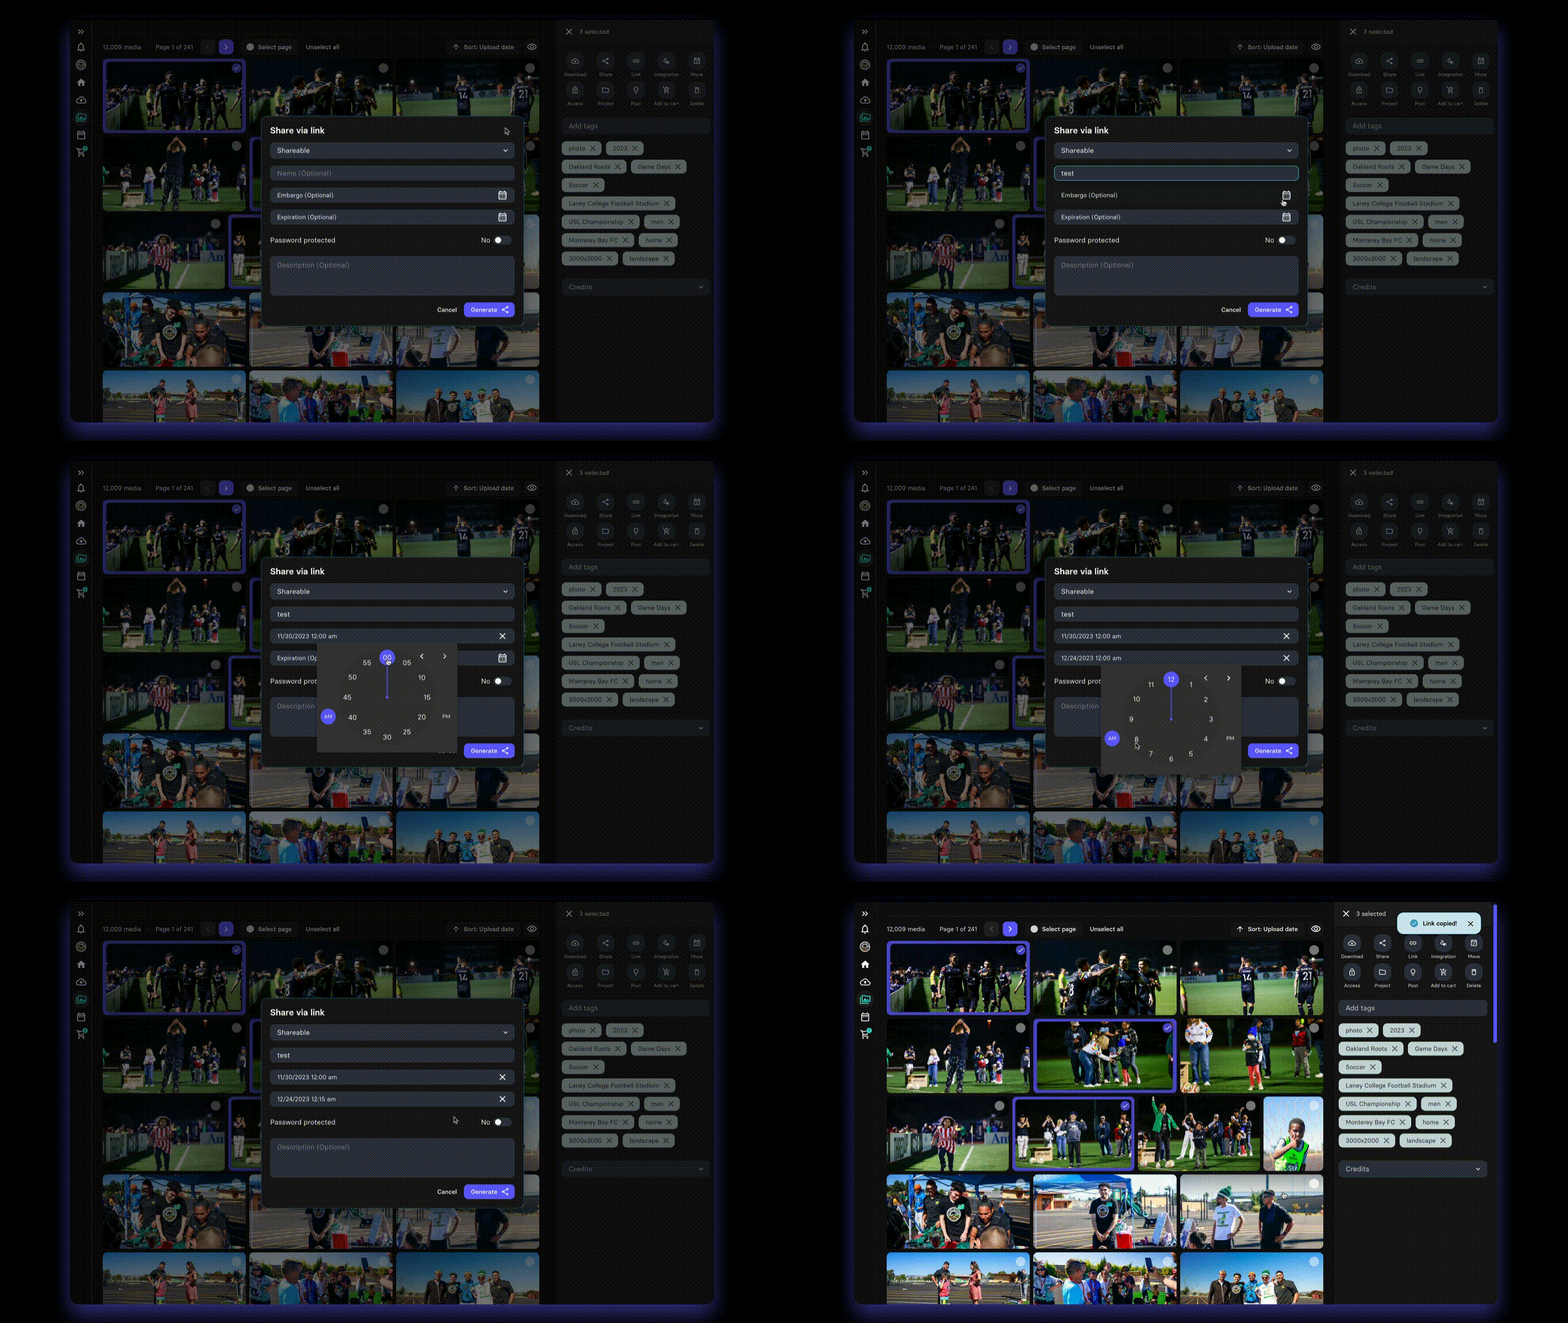
Once you have selected an asset, a pop-up will appear on the right side where you can manage this/ these asset/s.
Download: use the download button to download the selected medias, either compressed or not, with an overlay/ watermark or advanced settings (Export with metadata, custom dimensions (in pixels), or target file size (in mb).
Share:
Users: use this button to share to selected internal users.
Players: use this button to share content to selected players through the Athlete App. You can choose whether to only share to players detected and whether to send a notification.
External users: use this button to share content to external users. You can choose whether to share to all external users and whether you want them to receive an email notification.
Embed: use this button to share an embedded gallery of content made up of the selected assets. Copy it directly to your clipboard in either mobile-friendly, or iframe embed code.
Link:
Use the ‘Link’ button to create a shareable link with a custom name, embargo date, expiration date, make it password protected or add a description. Perfect for sharing an collection to an external party.
Use the ‘Link’ button to create a public marketplace in order to sell your assets. Set the price of the assets in your Billing settings.
Edit collection: use this button to move the selection of assets to another collection.
Access: use this button to edit permissions.
Use the ‘Add’ button to add permissions to selected medias, and then choose to share these assets to detected sponsors, players.
Use the ‘Remove’ button to remove permissions to selected medias, and then choose to remove access to these assets from detected sponsors, players.
Project: use this button to add the selected assets to an existing Project or a new Project.
Cover: use this button to select the asset as the thumbnail of the collection.
Group: use this button to group the selected medias together.
Post: use this button to create a new Post Suggestion. A post suggestion allows to you to send a suggestion to an athlete or athletes, with a suggested caption.
Add to cart: use this button to add content to your download cart.
Delete: use this button to delete the media asset.
Add tags: use this button and type bar to add tags to the selected media assets.
Credits: use this button to edit or add credits to the asset or assets.
Label: use the dropdown to edit the labels associated to the selected asset or assets.
Individual asset view (Photo)
Pencil button (✏️): use this button to edit the name of the asset
Download: use this button to download the asset, in original quality, or compressed, with an overlay/ watermark, with metadata, or with custom dimensions and target file size.
Edit: use the edit button to edit the asset in a new window. Choose whether you want to edit from original or compressed quality.
Follow: use the follow button to edit what notifications you receive for this asset. The options are for a ‘new version’ or a ‘new comment’, which can be received as App or Desktop notifications.
Ellipsis (•••)
Share:
Link:
Use the ‘Link’ button to create a shareable link with a custom name, embargo date, expiration date, make it password protected or add a description. Perfect for sharing an asset to an external party.
Use the ‘Link’ button to create a public marketplace in order to sell your asset. Set the price of the asset in your settings.
Users: use this button to share to selected internal users.
Players: use this button to share content to selected players through the Athlete App. You can choose whether to only share to players detected and whether to send a notification.
External users: use this button to share content to external users. You can choose whether to share to all external users and whether you want them to receive an email notification.
Embed: use this button to share an embedded gallery of content made up of the selected assets. Copy it directly to your clipboard in either mobile-friendly, or iframe embed code.
Add version: use this button to add a new version of the asset. Choose whether to set it as a default version and upload the latest version.
Add to project: use this button to add the asset to a project.
Change collection: use this button to move the asset to a different collection.
Delete: use this button to delete the asset.
Set collection cover: use this button to set the asset as the thumbnail of the collection of the asset.
Tags: edit the tags using the pencil button (✏️).
Info button (ℹ️): use this button to view the date, format, credit and metadata associated to the asset. You can also edit the description of the asset here.
Lock button (🔒): use this button to edit the permissions associated to the assets, for privacy settings, embargoes, expirations, digital rights management, usage and custom terms.
Comment button (💬): use this button to add comments to the asset. Tag internal users and collaborate internally.
Attachment button (📎): use this button to add attachments to the asset.
Individual asset view (Video)
Pencil button (✏️): use this button to edit the name of the asset
Download: use this button to download the asset in SD (480p), HD (720p), FULL HD (1080p) or Original Quality. Choose whether to add watermark, export metadata, and use custom dimensions (in pixels), or a target file size (in mb).
Follow: use the follow button to edit what notifications you receive for this asset. The options are for a ‘new version’ or a ‘new comment’, which can be received as App or Desktop notifications.
Run AI: use the Run AI button to run AI on the video for facial and text recognition.
Ellipsis (•••)
Share:
Link:
Use the ‘Link’ button to create a shareable link with a custom name, embargo date, expiration date, make it password protected or add a description. Perfect for sharing an asset to an external party.
Use the ‘Link’ button to create a public marketplace in order to sell your asset. Set the price of the asset in your settings.
Users: use this button to share to selected internal users.
Players: use this button to share content to selected players through the Athlete App. You can choose whether to only share to players detected and whether to send a notification.
Partners: use this button to share content to external users. You can choose whether to share to all external users and whether you want them to receive an email notification.
Embed: use this button to share an embedded gallery of content made up of the selected assets. Copy it directly to your clipboard in either mobile-friendly, or iframe embed code.
Add version: use this button to add a new version of the asset. Choose whether to set it as a default version and upload the latest version.
Add to Project: use this button to add the asset to a project.
Change collection: use this button to move the asset to a different collection.
Delete: use this button to delete the asset.
Tags: edit the tags using the pencil button (✏️).
Info button (ℹ️): use this tab to view the date, format, credit and metadata associated to the asset. You can also edit the description of the asset here.
Lock button (🔒): use this tab to edit the permissions associated to the assets, for privacy settings, embargoes, expirations, digital rights management, usage and custom terms.
Video & gear button (▶️⚙️): this tab unifies the Clipping tool and Control Room (i.e. Video Logs) so they can be used together
Logs: use this sub-tab to add ‘Time stamp tags’ or Logs to the video. These can be Log tags or athlete tags, and will be attached to a moment in your video. You can use these to directly clip and jump to moments in the video. Use the Upload button if you want to upload a data file which will add tags to your video.
Clipping: use this tab to clip videos of your original video. If you are a Pro client, you can also use this clipping tool on your Live videos. Reach out to us through the chatbot if you wish to upgrade your account.
Start / End / Move: use these buttons to set the start and end time of your clip, and the interval of time for every up or down arrow action.
Download: use this button to download the clip to your computer.
Publish: use this button to publish the clip to your media library.
Drag and pull the timeline to move it along.
Comment button (💬): use this tab to add comments to the asset. Tag internal users and collaborate internally.
Transcript button (📄): use this button to access, edit or clip directly from transcript.
Attachment button (📎): use this button to add attachments to the asset.
📬 Question?
Contact us through the chatbot.


